Showing posts with label DIY. Show all posts

Sunday, 25 May 2014

Surf's up.... A Surfboard Coffee Table!

Hello friends!

I had a bit of fun with this makeover...  as soon as I saw this old retro coffee table I knew just what I wanted to do with it! 

Here's a before pic, I had already started sanding and filling before I realised I had forgotten to snap a pic! ;)

After quite a bit of sanding and painting....  here's what I ended up with!  
Surf's up baby ;)


I think it'll look great in a beach house.... hopefully there's someone out there looking for a surfboard coffee table!?!

Thanks for stopping by!

Jo xx

Tuesday, 20 August 2013

Ikea Hack - "Rast" Drawers Makeover!

Hello!

Gosh where has the last month gone?  Time flies when you're having fun.  We are in the middle of planning our kitchen renovation.  In addition to the new kitchen we are replacing the entire floor in the back of the house and the back windows for French doors.  I'll post some pictures of our kitchen reno when we finally start!

I've also been quite busy working away on a few projects.  This one was too much fun...  my first Ikea Hack!  A lovely client asked if I could give these little Rast Drawers a personality makeover ;)

Here's the before, the Rast Drawers retail for $49.95.  It's a super basic little piece...  which comes in the raw ;) 


I started by adding some sweet moulding detail to the draw edges to add some much needed character.  This was sold in a 2 metre length and just fit in the car! 

I stained the piece in a colour called Brazilian Roast, which I think gives it a nice depth and is a lovely contrast to the ASCP Old White on the drawer fronts.  After some distressing and waxing I added some gorgeous glass knobs to complete the makeover.


I really enjoyed this little makeover and my client has a one of a kind set of drawers that's a little bit familiar! ;)

Happy Week!


Jo xx


Linking up here this week....
The Dedicated House
Elizabeth and Co
Alderberry Hill

Domestically Speaking
Be Betsy


Thursday, 6 June 2013

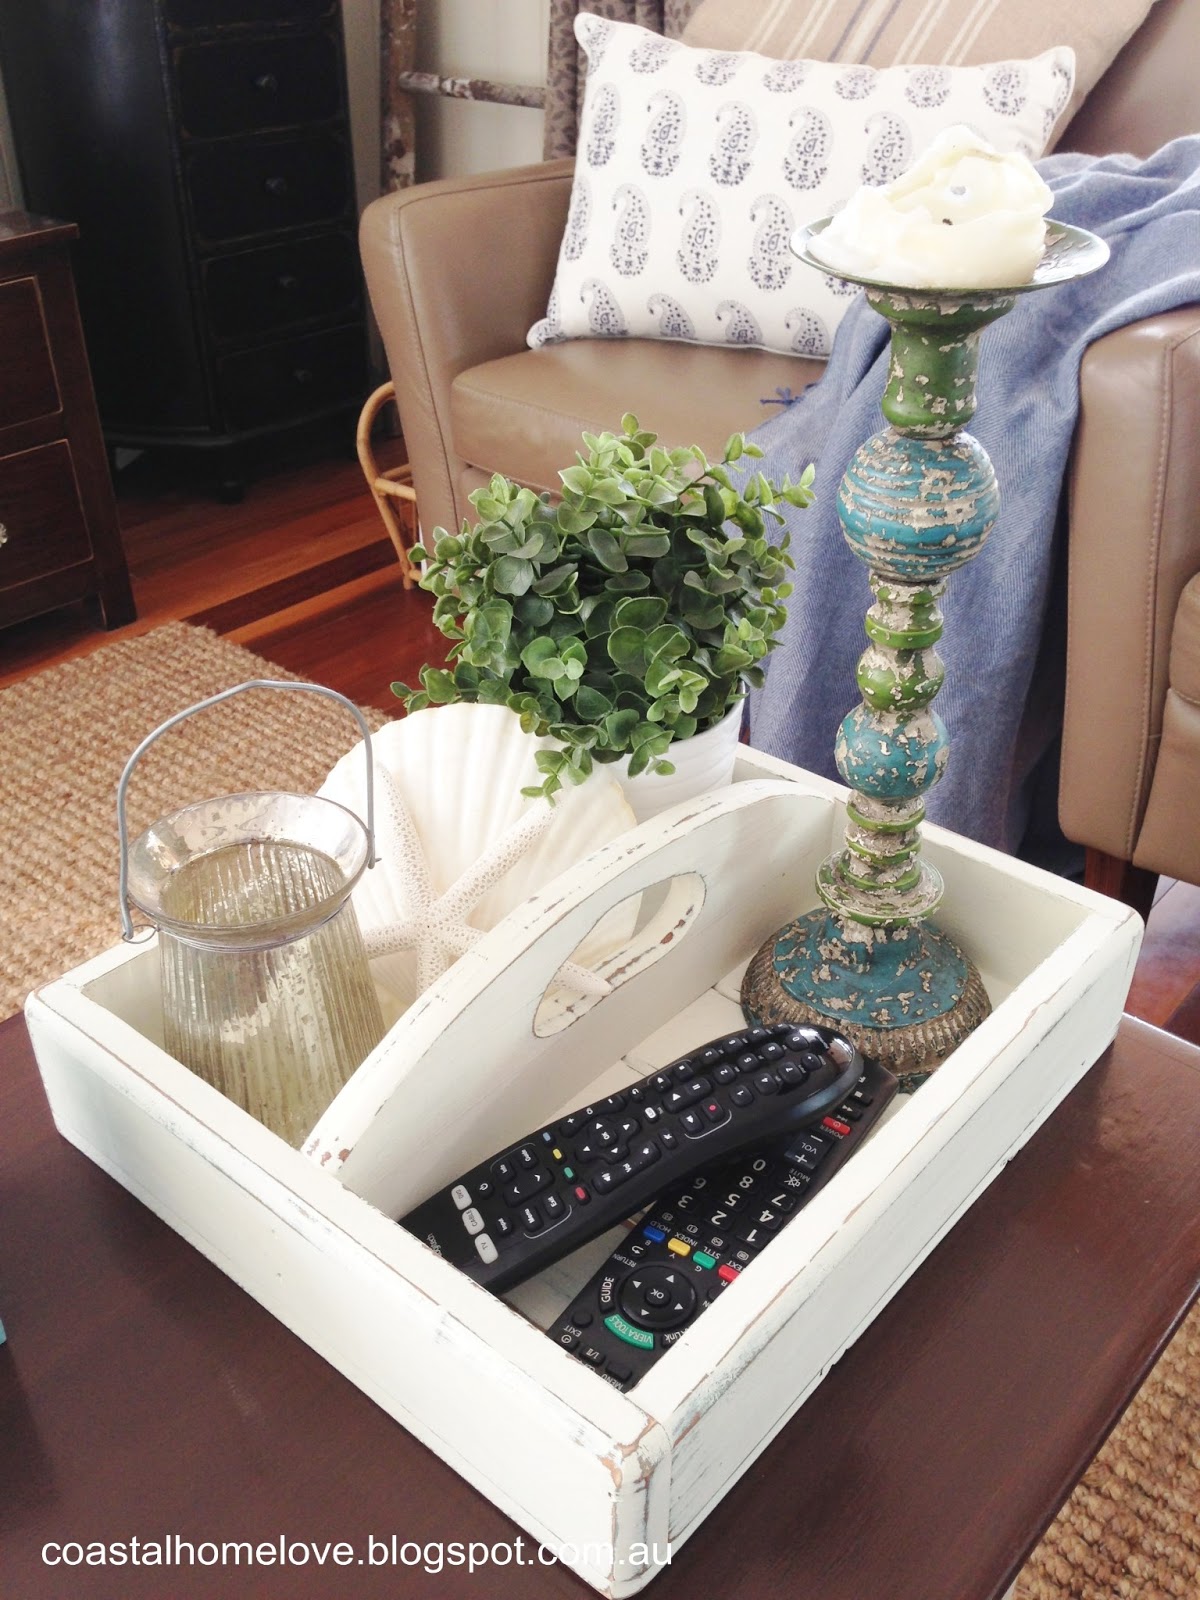
A Crafty Little Solution for those Dreaded Remote Controls.... A Coffee Table Caddy!

Good Morning!

A quick little post of something I whipped up the other day.  No before pics, I was literally watching tellie and looking at the remotes scattered on the coffee table. Ughh.  Next thing I know I was painting up this caddy to combat the coffee table chaos.  Being the only female in the house, the boys just don't understand my dislike of remote controls. Ugly things. And soooo many of them!

Anyway here's my crafty little solution... a sweet coffee table caddy!  Easy to move out of the way for Friday night pizza ;)  Holds said ugly remotes which are hopefully disguised somewhat by pretties yet easily accessible.


Finished in Annie Sloan Duck Egg and Old White {LoVe}.

What do you think about a Coffee Table Caddy?  Where do you stow your remotes?

That's a Hat Trick from me.. 3 blog posts in one week. Crazy!   I'd love for you to join me here and follow along my little blog :)

Have a happy weekend lovelies,

Jo xx


Linking up here....


Monday, 3 June 2013

A Vintage Table Makeover in Coastal Blue!

Hello Friends

I'm back to share a makeover I finished a couple of weeks ago.  Two posts in as many days... unheard of from me!  I guess that what happens when the weather is wild and wintery and you're housebound :)
 
This gorgeous half-moon table belongs to a lovely client who asked me to give it a much needed makeover.  Her hubby couldn’t quite see the potential and why she loves it... but hopefully after a makeover he’ll “get it” ;)  

I absolutely love the shape of this old piece, it has buckets of character and as soon as I saw it I knew it would come up a treat.
Before… 


He was in pretty bad shape, the top had two large holes all the way through and many layers of peeling paint.

As soon as he was dropped off I got started stripping the top back and repairing the holes.  
Old pieces like this one have the potential to be amazing with some time, patience and a whole lot of TLC.  If you happen to find a hidden gem at the back of Mum and Dad’s shed please note, more often than not, the paint probably contains lead.  Lead is very nasty and can be very dangerous so please, please use precautions.

Once he was all prepped, a horrid messy job, I gave him a good sand all over and undercoated him.  Then he was ready for some colour... going for a fresh Coastal look, I mixed up a beautiful shade of pale blue and gave him two coats.  Then took to him with some fine and medium grade sandpaper.  I finished him off with some gorgeous Annie Sloan clear wax.


I love how this piece turned out, the toughest part of my job here was handing him back!  


Hopefully my client's hubby changed his mind and now loves him as much as she does  ;)

Thanks for stopping by 
 
Jo xx


Linking up here....


Thursday, 29 November 2012

Rustic Christmassy Signs headed to Market

Hi there,

Well just a quick little post, I've been so crazy busy this week preparing for my next Market outing tomorrow night.  I've made some more little rustic signs. 

I took some of these to my last Market but thought I'd do a few Christmassy ones.  I hope people are feeling festive ;)


Noel is one of my favourite Christmas words.  Not only is it a beautiful word, it's my Dad's name and was my Pop's name too.  So extra special to me.


I made a bunch more different ones.. but ran out of time to snap some pics! I might take some tomorrow night and share in another post :)
 
What's your favourite Christmas word or phrase?
 
Thanks for stopping by,
 

Jo xx


Sharing at...


Sunday, 25 November 2012

White Wicker Dreaming with a French Coastal Twist ;)

Hi Gorgeous Coasties!

It was a real scorcher here in Sydney today... first taste of Summer and about time too!

Sharing a quick little make over I finished recently.  I heart wicker...  I've blogged about my love before here and here.

So when I came across this little gem I couldn't walk past it...  $10 orange wicker special!

Before:  The colour almost looks nice in this shot.. but it was your basic fake tanny orange wicker.

 
A little work in progress shot.  I hand painted it as I wanted a rustic look as well as more control over the finish.  Sometimes I find with a spray can it can be a little uneven with this type of wicker.


After the white I added a hand painted blue stripe... I was going for a rustic French Coastal look!


After:  White, bright with a French Blue Coastal Stripe :)


Now to decide where to use him, I think it's quite a practical and versatile little piece.  My original thought was to put it to organising duty in the pantry.  But I'm also thinking it might be practical to hold Bath roomy things.  What do you think?

Happy White Wicker Dreaming friends,

Jo xx


Linking up to these lovely parties...


Thursday, 15 November 2012

Vintage Ladder Love Affair

Hello lovelies

I have a thing for many things... one of those things is vintage ladders.  I heart them.

I've made over a few of them and can't resist picking them up when I see them.  I was driving by my local Salvos store after my son's cricket game on the weekend... and I thought I'd pop in for a quick look see.  I ended up walking out with these two beauties...  and a few other goodies!  Gotta heart thrifty shopping!

Here's the only before shot of my ladder...  in my outdoor studio ;)


I gave him a good scrubbing, and white washing. 


I didn't want to cover the original stencilling on the sides or the splatters and splobs of paint which he'd gained over the years.  White washing gave me that shabby beachy look whilst still allowing his character to shine through!


 He's quite a handy fella.... he had me hooked at first sight :) I really love his hooks! 


I added some numbers to the steps, sanded a little and waxed.


My plan was to sell him at my next market stall...  but I'm growing quite fond of him and his hooks ;)


Now just between you and I, he's not my one and only...  I have another handy fella stashed in our ensuite.... he's on towel duties.  There's also one in the corner of our family room, casually taking care of throw rug business.

.....and then there's the other little one I bought with this one...  thinking she'd be nice to hold scarves in my wardrobe...  mmm thinking I may have a problem ;D

Thanks for stopping in, have a great weekend

Jo xx


 Linking up to these fab parties....


Sunday, 4 November 2012

Back up on the Bloggy horse with a little makeover...

Hello Lovely friends!

I've missed you!!  I've been totally MIA these past few weeks....  we had an amazing 3 week family holiday to the US. Since returning I held my first market stall and have just been crazy busy catching up with life! 

I've missed this little blog and reading all of my faves too!  High time I got back up on the Bloggy horse... and what better way than to share a sweet little makeover...  Giddy Up!

So this project has been a work in progress for an embarrassingly long time.  I started it before we went on holidays...  so I'm happy to have finally finished it!

I bought some coffee grain sacks a few months ago, with a few ideas in mind but nothing concrete.  I started by washing them.  Now let me tell you wet hessian sack is not the nicest smell, not quite wet dog, but not exactly pleasant!  Anyway they dried in the sun and smell perfectly fine now :)

So they were sitting innocently next to ironing board, which is next to my sewing machine and I was ironing the boys school shirts when I spied them out of the corner of my eye.  They were totally beckoning me. One thing led to another and before I knew it, I was cutting and sewing.

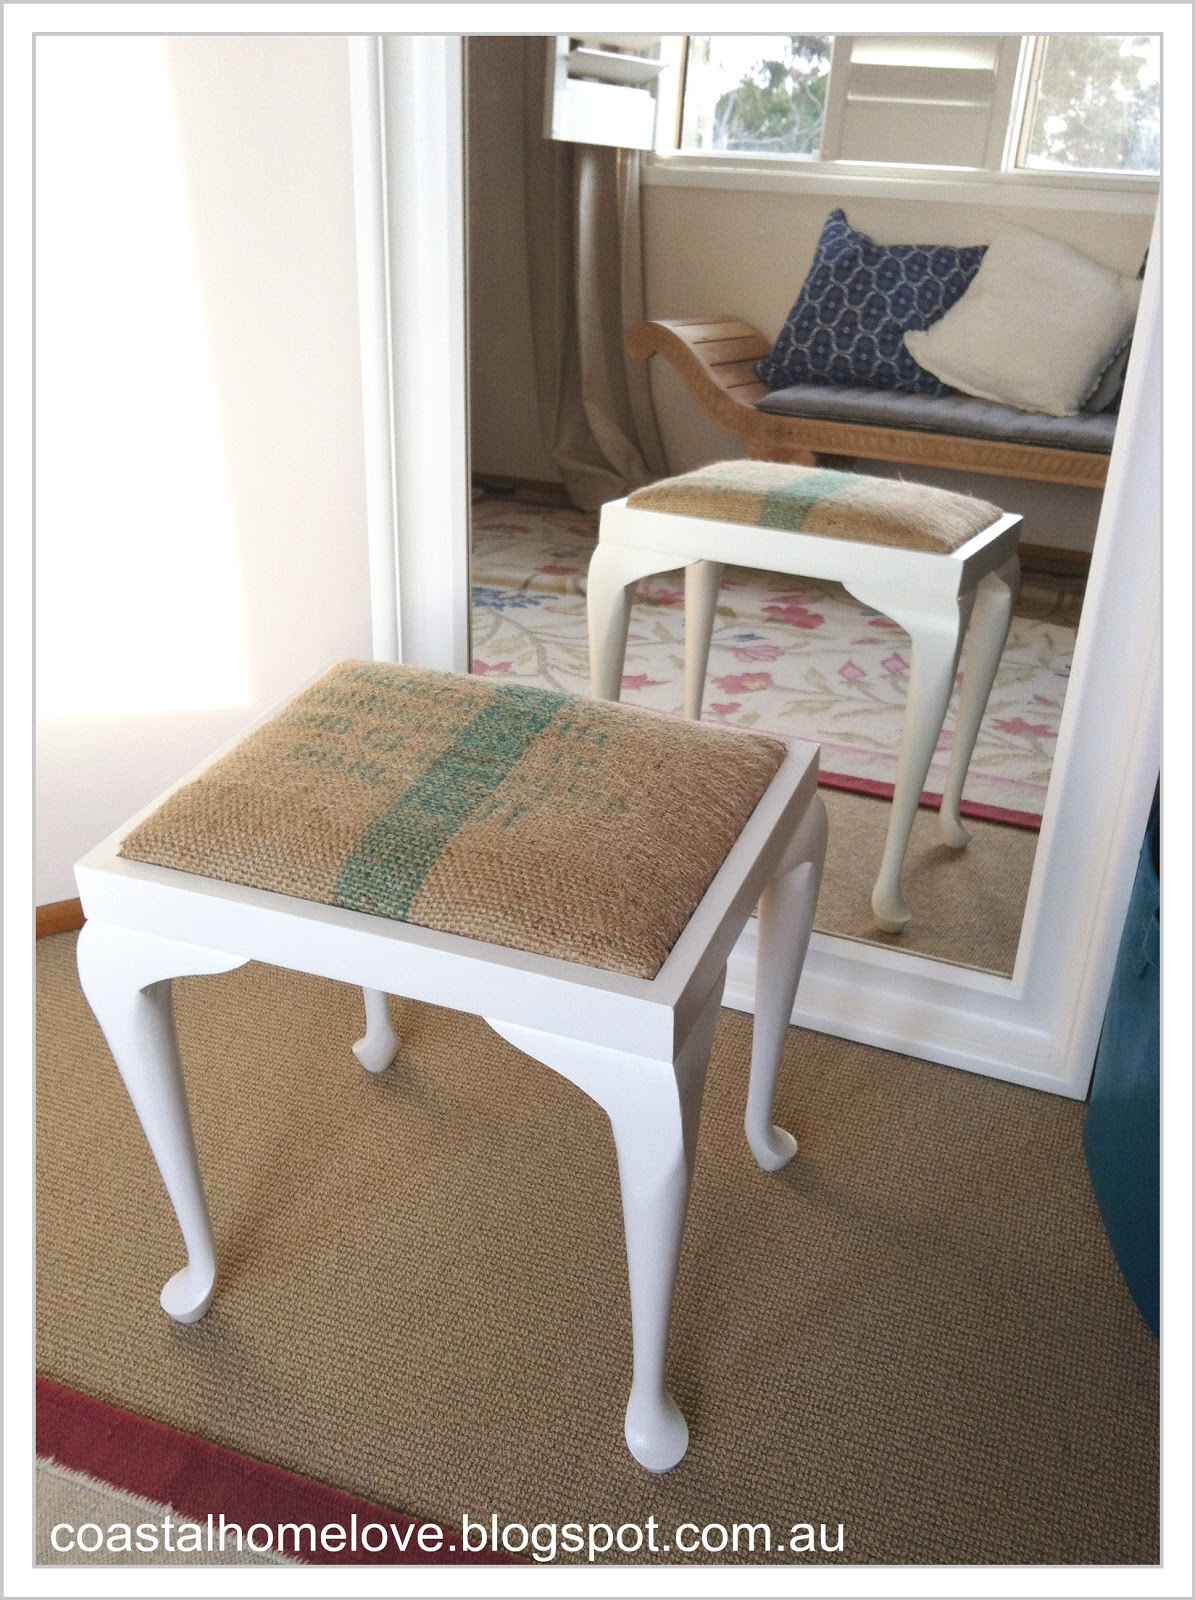
I've had the vanity stool kicking around for ages, it was my Nan's, she used to sit on it to do her make up.  I recovered it years ago in a dark denim fabric and it was looking more than a little tired.


So my little vanity stool got a coffee grain sack reupholster job and a new lick of paint.  Here she is after...


I love the green stripe and the stencilled details. 


I only used a small piece of the sack and I have some fun plans for the rest of it!

Do you totally stumble into starting a project? Or do you plan? 

Thanks for popping by,


Jo xx

Linking up ... :)

Thursday, 13 September 2012

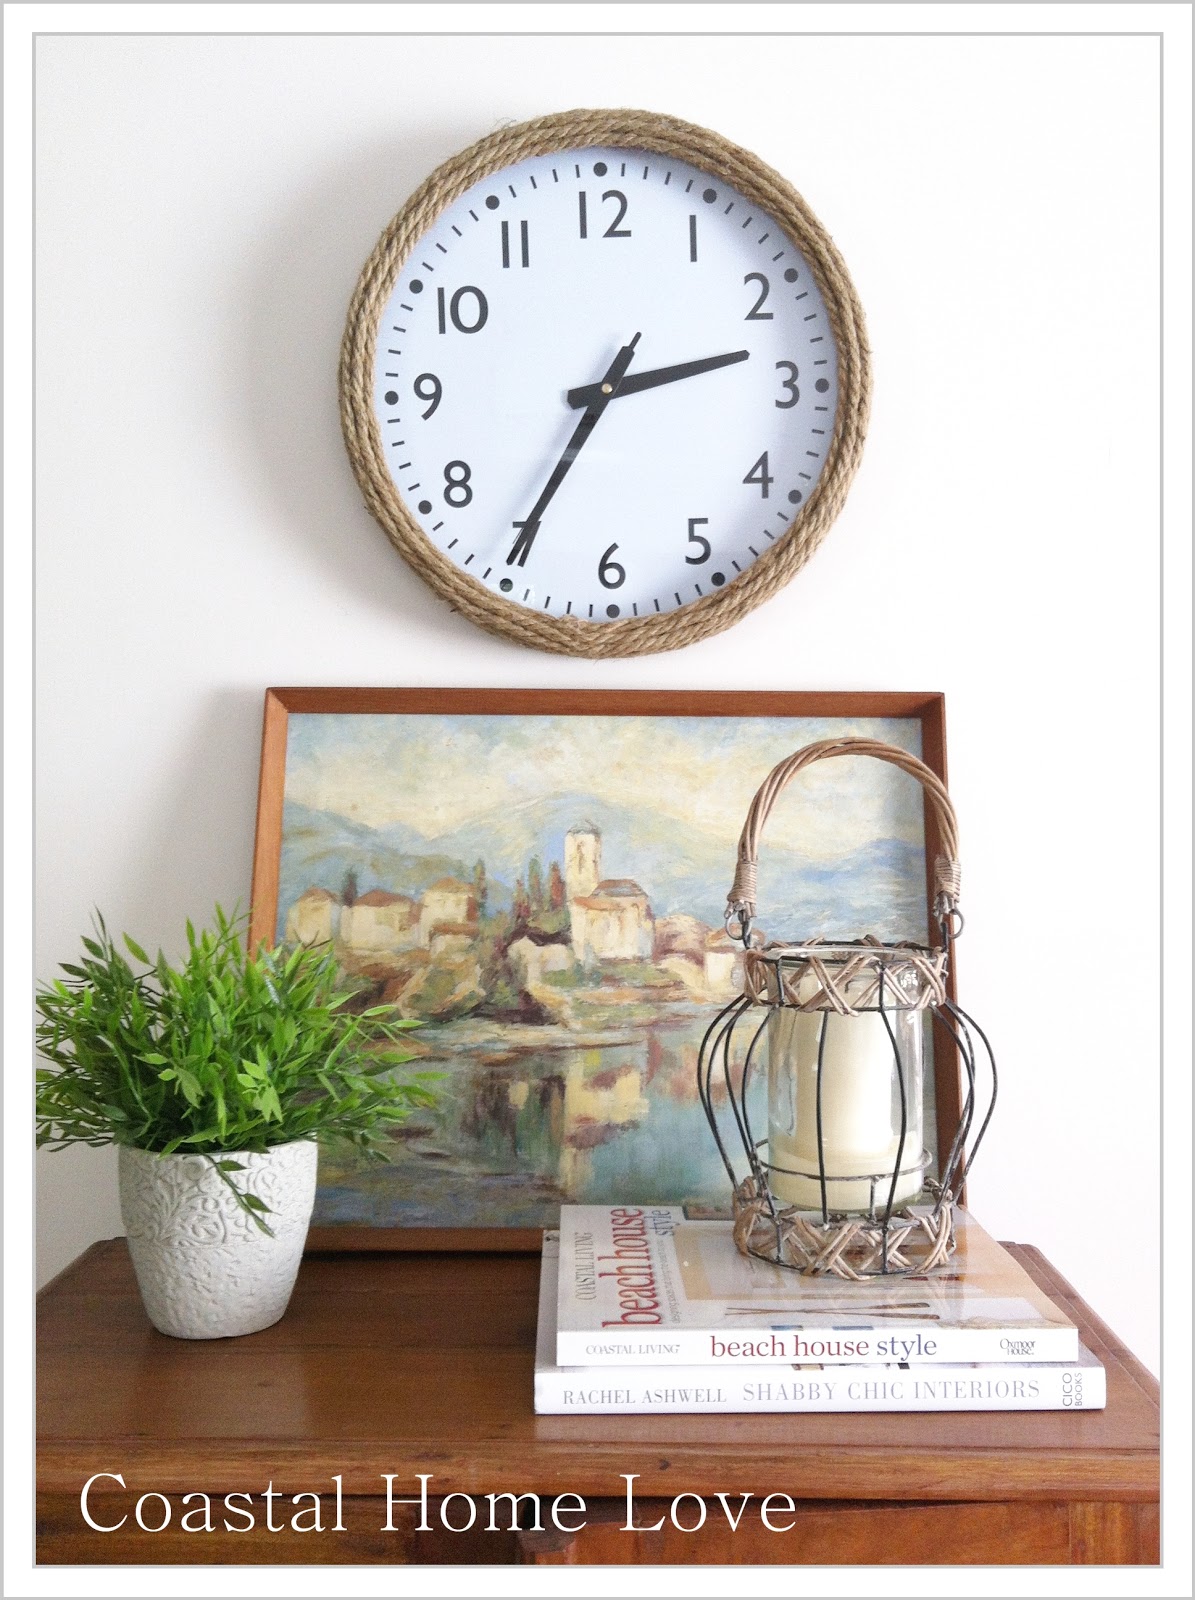
Tick Tock, Tick Tock.... What's the time on the DIY Coastal Clock?

Hi!

So I got a new toy a little while ago and I seriously do not know how I ever survived without it!  I'm talking about my new hot glue gun.  Nothing high tech, nor expensive about it.  It's just plain awesome.  I've used it for numerous little projects and repairs since it got it.

I thought I'd share my super easy DIY Coastal Clock makeover! 


I started with a basic clock, I picked up from Kmart ($10). I was happy to experiment for a tenner, if it all went horribly wrong there would be no tears shed.

I'm sure that little Swedish boutique (aka Ikea) would have several likely candidates on offer. 

If you wanna give it a go, it's seriously easy, here's what you'll need;


  • Some jute rope {Believe it or not this sucker took approx 8 metres of rope!!}
  • Hot Glue gun
  • Lots of hot glue refill sticks!
  • Approx 30-40 minutes
  • A steady hand
  • Some baby wipes on hand to wipe up the inevitable glue mess as you go ;)


Step 1:
Use hot glue gun to affix rope to outside of clock.  The hot glue sets really quickly, just hold in place for a few seconds and continue slowly.

Steps 2-6:
Repeat step 1 until clock rim is fully covered ;)


Easy peasy...  one DIY Coastal Clock! 
This one's headed for the boys playroom :)


What's the time on the Coastal Clock?  Why I do believe it's time for tea :)

Thanks for stopping by...

Jo xx


Related Posts Plugin for WordPress, Blogger...